Showing posts with label Wink of Stella Brush. Show all posts

Tuesday, February 14

A Crazy Valentine's Day!

Happy Valentine's Day! I've been working on a little Valentine's surprise treat for my coworkers. Most of my coworkers have a dog or cat or both so I thought it would be fun to create some ATC's using Tim Holtz Sizzix "Mini Crazy Cats and Dogs" Cling Stamps and Framelits Die Set. The mini set is a "purrfect" size for ATC's and the coordinating framelits made creating 13 of these much easier! I started with a watercolor background using different shades of red and pink distress inks. I then stamped the dogs and cats with the Misti Stamping Tool. I colored the critters with Copic Markers. I stamped a quick sentiment and added some small hearts punched from the water colored paper. I colored the small hearts with a Wink of Stella brush to add an extra pop of glitter.  Each ATC looks different - that's one of the many reasons I LOVE watercoloring!! Here's a peek of them together followed by close ups of each ATC. 
I have to admit, creating 13 of these: 10 for my coworkers, 2 for friends and 1 for me, was fun!! Having the coordinating framelits and the Misti Stamping Tool made it so much faster. I'm still working on my Copic Skills so this was GREAT practice. 
Here's some close ups of the crazy critters.
I love the grey and pink combo - I used Picked Raspberry for a few of the backgrounds. 
Here's the crazy doggies.
I made a few ATC's with the dog below coloring him in different color combinations. 
Here's a lighter version of him.
I love how goofy this guy is - he's the party dog!
Here's the last pup.
Thanks so much for stopping by and I hope you have a crazy, fun Valentine's Day!!

Saturday, October 3

World Card Making Day 2015

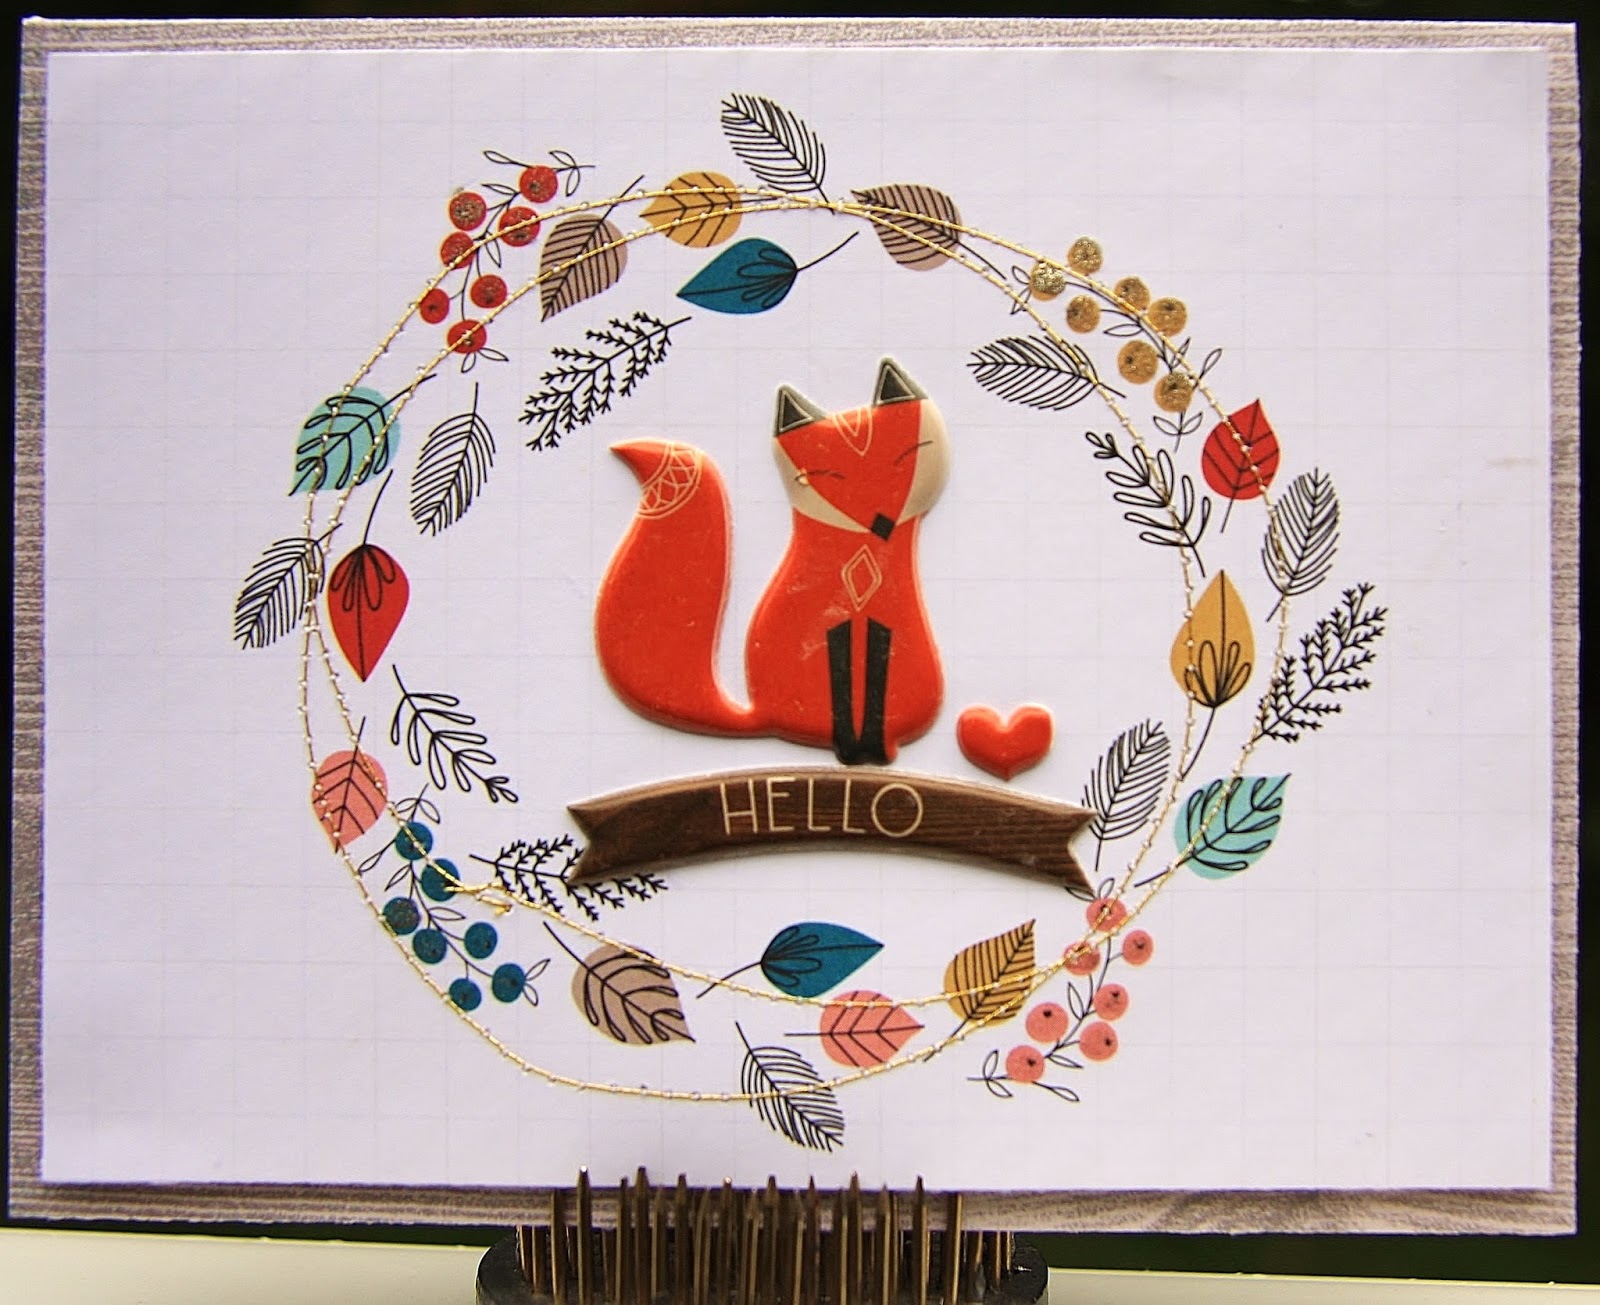
Today is World Card Making Day! Making and giving a handmade card is special and sometimes a challenge - for me anyway. This year, my card was so simple and can be used for any occasion.
While I was going through my latest Noel Mignon Blue Moon Daily Diary Kit, I noticed a piece of Pink Paislee's Cedar Lane cut apart paper. It started as a 4x6 cut apart which I trimmed to 5.25 x 4.0 and used as a card front. The card base is a piece of wood grain paper also from the collection which I cut to A2 card size. Here's my card ...
 I stitched around the leaf wreath with gold thread - this looks so pretty IRL! I added some Wink of Stella Brush Pen to the berries on the wreath.
I added the ADORABLE fox, heart and hello from the puffy stickers that coordinate with collection.
I love how simple this card is. It came together quickly and the stitching is a great way to jazz up any project! Enjoy making your cards today and I love to hear from you so stop by and say hello!! Have a great weekend!

Saturday, August 1

Mixed Media Monthly Challenge #15 Reveal | Get Texty

OK - Slow down Summer!! I don't want to believe it's already August! Summer is way too short in New England - especially after this past winter. I'm going to savor every last moment of summer and document the heck out of it!
With the first of August comes a brand spankin' new challenge over on the Mixed Media Monthly Challenge Blog!! This month's theme is oh so fun! "GET TEXTY"!
Oh, the endless possibilities, right!! There are so many ways to interpret this challenge. I immediately thought of what I wanted to create. Here's my canvas ...
I started with a layer of Fiber Paste - my new FAV Mixed Media product. It leaves a yummy texture on the canvas that paints and spray inks settle into. I then randomly added OLD, and I mean OLD, chipboard alpha to the background. Once I liked the placement I painted a coat of gesso over the whole canvas.
Then comes the fun part. I decided to used Heidi Swapp Color Shine sprays for this piece. I started with Citron - a GORGEOUS shade of green.
I then added Teal, making sure I dried in between applications. I also added some White after the teal was dry.
I kept playing until I liked the result. I found some old Prima flowers from my stash that had a mixed media look to them. I added them to the lower left corner of the canvas and added some orange stemmed flowers for more color and texture.
I let the ink sprays drip onto the side of the canvas as well ...
One of the final steps was to add a fun Tim Holtz Gumdrop to the center of the flower. I applied some Mushroom and Gold Alcohol Inks to the gumdrop. I then splattered Gold Heidi Swapp color Shine to the canvas, added some Tim Holtz Small Talk - which I colored with a Wink of Stella Brush Pen in Clear, and was done! So easy and super fun!
Be sure to stop by the blog to see about our prize this month sponsored by the Fabulous Ellen Hutson.com!!

 Be sure to check out the creations from the Design Team. We hope you will continue to join us this month and Get Texty!!!
 
SUPPLIES:


Tuesday, March 17

5 for 5 Blog Hop Event: Easter | Day 2

Welcome to the second 5 for 5 Blog Event! We are 5 crafty blog friends creating 5 Holiday Inspired projects for 5 consecutive days! Each day our 5 Designers will post one Holiday Inspired Project based on a theme. Some of us are offering prizes, so be sure to visit all the blogs listed below and leave a comment. I will be offering a prize so be sure to comment EACH DAY in order to qualify!
 Welcome to Day 2 of our 5 for 5 Blog Event! This month's event runs from March 16th until March 20th and is based on Easter.
Todays theme is "Pink and Lavender". I made a cute little tag to give to a friend who is helping me out. The background was created using a piece of paper from Lawn Fawn's "Hello Sunshine" 6x6 petite paper pad. To create the grass I used Lawn Fawn's Grassy Border Die and a piece of paper from "Let's Polka" 6x6 petite paper pad. The cute tulips were stamped and then die cut with Lawn Fawn's "Eggstra Special Easter" Stamps and Dies Set. I have used this set a lot for this Easter!

 
I embossed the sentiment and hearts. The adorable little heart is also part of the stamp set! I used a Wink of Stella Brush Pen on the tulips but the picture didn't capture the awesome glitter. Here's a close-up of the tulips.


Love how this makes me feel like Spring is almost here!! Please stop by and give some love to the 5 for 5ers - you will love what they created!

 
5 for 5 Designers:
 
I will return tomorrow with my favorite card of the hop! See you then!  

Thursday, January 29

5 for 5 Blog Event: Valentine's | Day 4

Welcome to Day 4 of our 5 for 5 Blog Event. Each day for 5 days our 5 Designers will post one Valentine's Inspired Project based on a theme. The theme for today is "Glitter". I created a fun card using some Stampin' Up! products. I fell in love with this adorable "Hey, Valentine" clear stamp set and it allowed me to practice more with my Blendabilities. I stamped the image on Neenah Solar White cardstock with Tuxedo Black Memento Ink and cut it into a banner shape. I colored the cute fish with Blendabilities. I used Lawn Fawn's Stitched Rectangle Stackable Die to cut a piece of paper from the "Let's Polka" 6x6 paper pad. I added a doily to the mix and here's my card ...


I used a Wink of Stella Brush Pen to add glitter to the heart and the bubbles ...


We have only one more day to share some fun Valentine's inspired projects with you. Tomorrow I will share my giveaway and all you need to do is comment on all 5 days of our blog event to qualify. I will chose a random winner and make the announcement on Monday February 2, 2015. Thanks for stopping by and I will see you tomorrow!! Please visit the designers blogs below for even more inspiration!


5 for 5 Designers:
Lynn Kopas <<< you are here

Sunday, January 4

Creative Scrappers Sketch 285 | Reveal

Hello Bloggers - Happy Sunday! Hope you all had a great time welcoming in the New Year!! I had a very low key evening but nice just the same!
I wanted to hop on today to share my layout using Creative Scrappers latest sketch - 285. This was a fun sketch - I think I say that every time!! I used Fancy Pants "Oh Deer" collection from my latest Noel Mignon Kit "Cable Knit" but in a winter-themed way. I love when a holiday collection can be used in a non-holiday way! I had a cute photo of Simba in the snow that went perfect with this fun collection. Here's my layout ...


I used vellum over the some of patterned papers to soften the look. I colored the wood veneer snowflakes with Clear Glitter Wink of Stella Brush which adds a nice glittery look. I also added some pretty sequins from the "Oh Deer" collection ...


Here is sketch 285 ...


Our sponsor for January is SpiegelMom Scraps. Jody has a great website and an adorable Etsy shop. She is generously offering $25.00 off a purchase of $35.00 or more on her website Spiegelmom Scraps. For a chance to win all you need to do is create a layout using sketch 285 and/or 286 and enter them using the inlinkz widget on the Creative Scrappers blog. The deadline to submit your layout(s) is January 31st Midnight EST.  
Visit SpiegelMom Scraps -- Facebook/ Shop/ Blog
Thanks for stopping by and have a great week! I'll be back soon with more crafty stuff!

Friday, December 5

12 Days of Holiday Inspiration - Day 5

Welcome to Day 5 of the 12 Days of Holiday Inspiration Blog Event brought to you by the "Inspiration Crew".
We're just a group of online crafty blog friends who love being creative. This time we're doing a 12-day event to provide you with tons of Holiday Inspiration.
We're making crafty projects using products we like and some of us are even offering prizes. Check each blog and the information there for what prizes are being offered and when the winners will be announced on that blog.
Today I decided to change it up a bit and create something more in the altered art realm. I love bottle cap art and finally created my first piece. I found a free printable vintage Holiday image and sized it to fit my 1.5" bottle cap. I punched out the circle image and glued it to the inside of the cap. I wrapped a small piece of silver pipe cleaner around the inside. With a cropadile I punched a small hole in the top and bottom of the bottle cap and added  jump rings. The top jump ring allows for a ribbon or an ornament holder to hang the ornament. The bottom jump ring allowed me to add some beading.

 
It's hard to see but I used a clear Wink of Stella Brush to highlight Santa's hat, tree and belt! Here's a close-up ...
 
 
I will definitely create more bottle cap art in the future. The caps come in many sizes,  up to 4.0".
As usual, check out all the blogs of the crafty participants below for lots of Inspiration! I will see you all tomorrow for a new Holiday project!


Lynn Kopas  <<<that's me>>>

BLOG CREDITS